If you’ve been scrolling Pinterest lately, you’ve probably noticed one nail trend everywhere—brown leopard nails. This timeless animal print has made a huge comeback thanks to its classy, neutral look that pairs well with every outfit. The best part? You don’t need to visit a salon to get this trendy manicure.

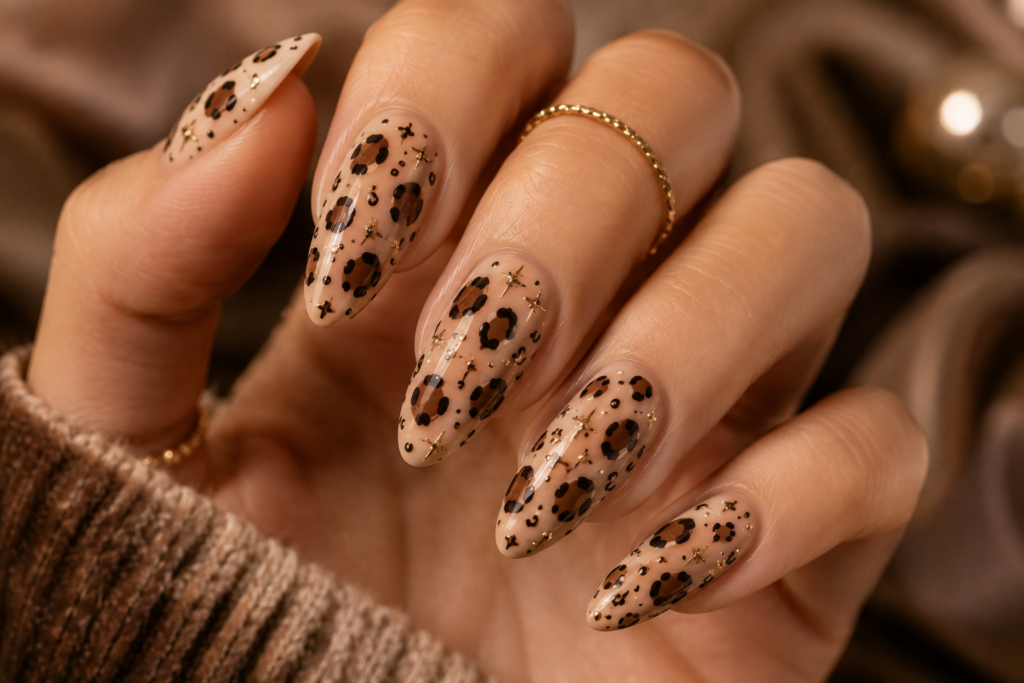
In this easy guide, you’ll learn how to create brown leopard nails at home, the tools you’ll need, simple step-by-step instructions, and pro tips to make your manicure last longer.
Save time by shopping all the essential leopard nail products below ⬇️
What You’ll Need for Brown Leopard Nails
Before you begin, gather these essentials:
- Base coat
- Glossy or matte top coat
- Light nude or beige nail polish
- Chocolate brown nail polish
- Dark brown or black nail polish
- Dotting tool or toothpick
- Thin nail art brush
- Nail polish remover
- Cotton swabs
Using neutral shades creates the signature classy brown leopard look that’s trending on Pinterest.
Step 1: Prep Your Nails
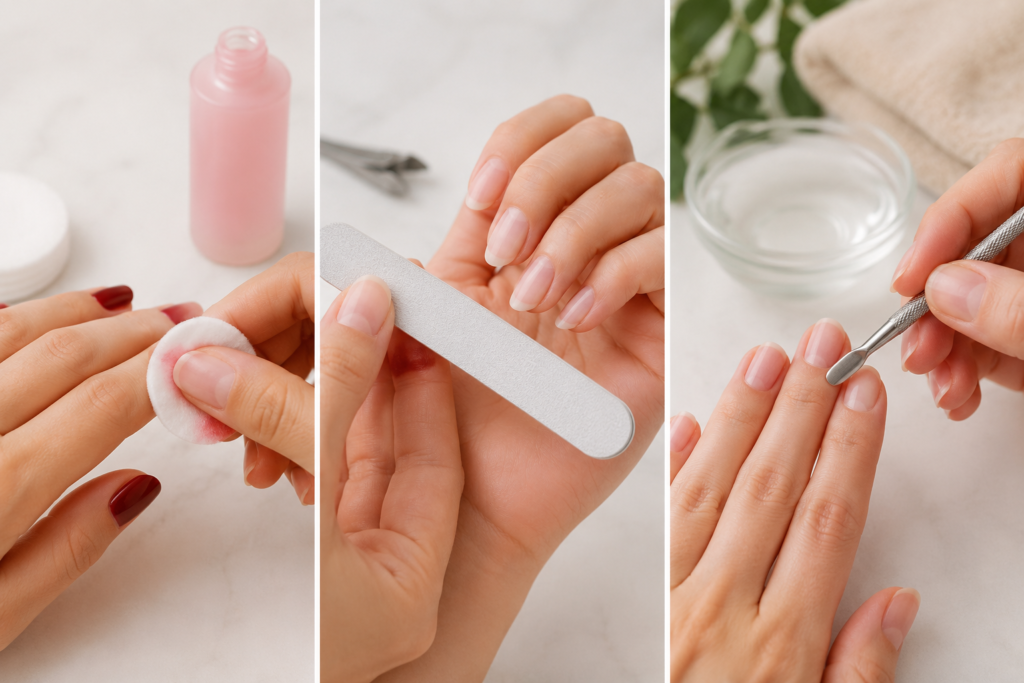
Healthy nails make every manicure look better.
Start by:
- Removing old nail polish
- Filing your nails into your favorite shape
- Gently pushing back your cuticles
- Buffing the nail surface
- Washing your hands to remove oils
Finish with a thin layer of base coat to protect your natural nails.
Step 2: Apply the Base Color
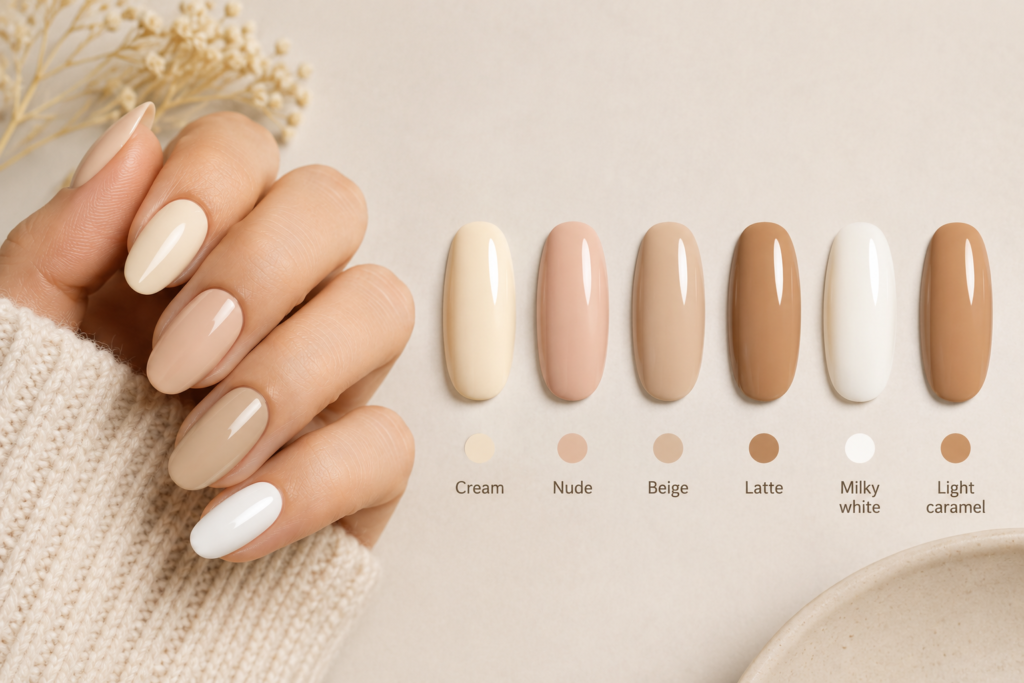
The classic brown leopard nails look starts with a soft neutral background.
Popular base colors include:
- Cream
- Nude
- Beige
- Latte
- Milky white
- Light caramel
Apply two thin coats instead of one thick coat for a smooth finish. Allow each layer to dry completely.
Step 3: Create Brown Spots
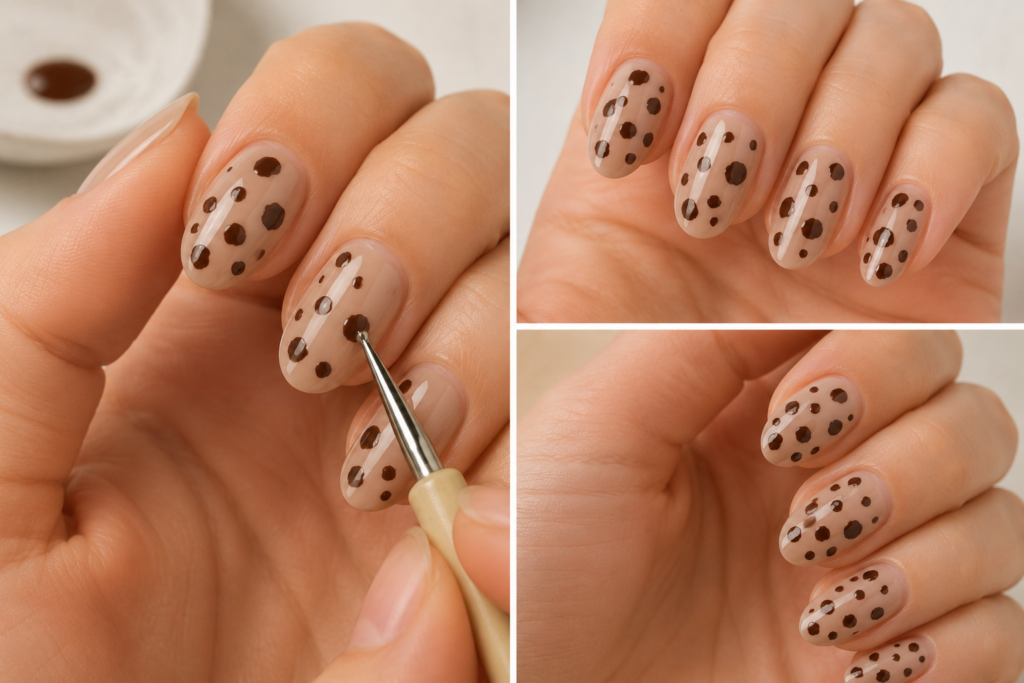
Using your dotting tool, add random chocolate brown spots across each nail.
Don’t worry about making them perfect.
Real leopard prints are naturally uneven, so different sizes actually make your manicure look more realistic.
Leave a little space between each spot.
Step 4: Outline the Spots
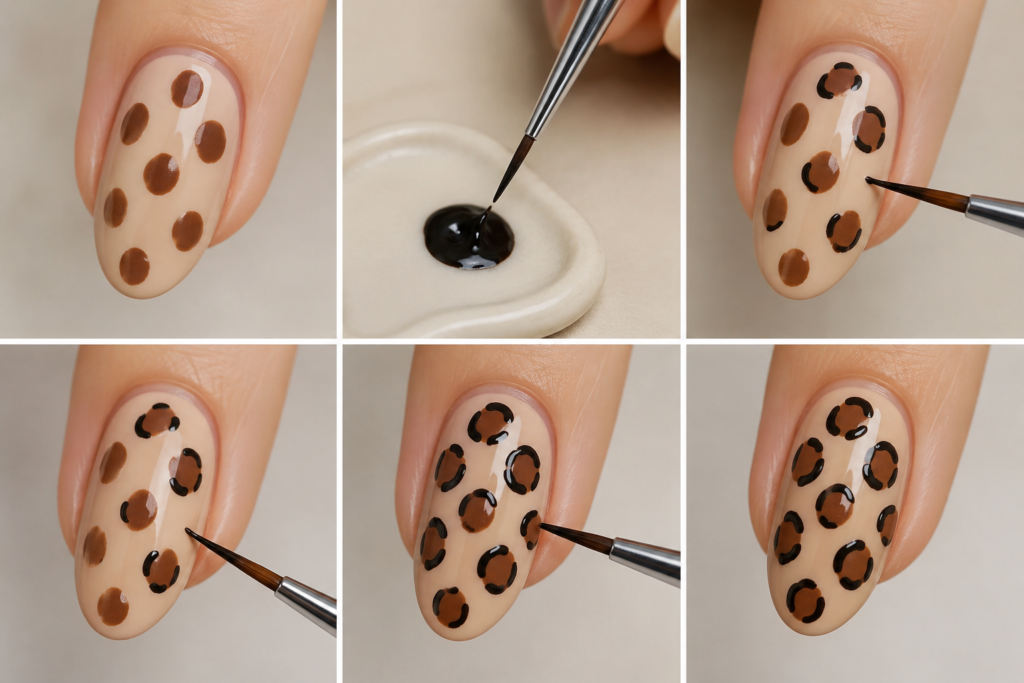
Dip a thin nail art brush into dark brown or black polish.
Instead of drawing complete circles, paint small curved lines around each brown spot.
This is what gives leopard nails their iconic look.
Remember:
- Keep outlines broken.
- Vary the shapes.
- Avoid making perfect circles.
The more random the pattern, the better it looks.
Step 5: Add Tiny Accent Dots
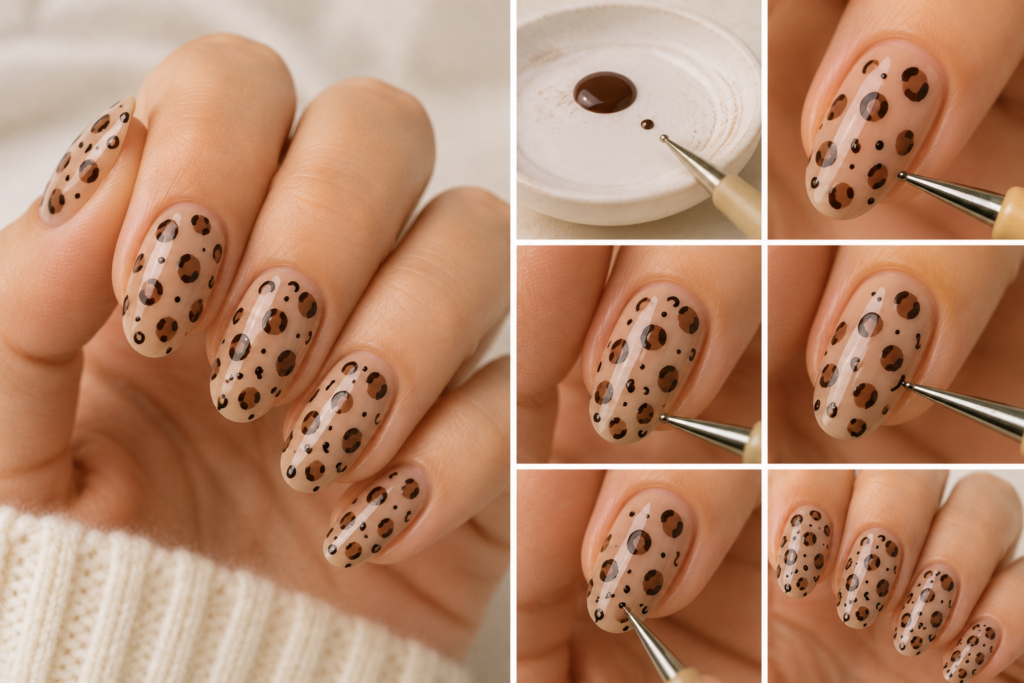
Fill empty spaces with tiny dark dots and mini curved lines.
These small details make the design look fuller without making it feel crowded.
Less is often more, especially for a chic neutral manicure.
Step 6: Seal Everything with Top Coat
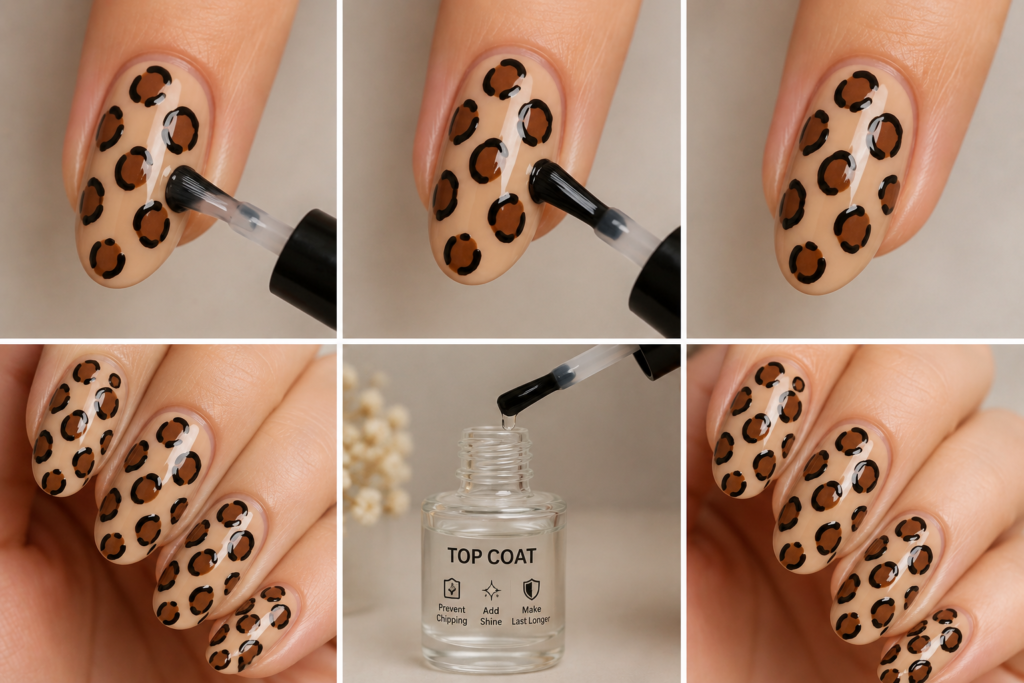
Wait until your nail art is completely dry.
Apply a generous layer of top coat to:
- Prevent chipping
- Add shine
- Smooth the design
- Make your manicure last longer
If you prefer a modern look, try a matte top coat instead of a glossy finish.
Easy Color Combinations
Want to customize your brown leopard nails?
Try these trending combinations:
- Beige + Chocolate Brown
- Nude + Espresso Brown
- Cream + Mocha
- Latte + Dark Brown
- Caramel + Black
- Taupe + Coffee Brown
These neutral shades work beautifully for every season.
Beginner Tips for Perfect Brown Leopard Nails
If this is your first attempt, keep these tips in mind:
- Use thin coats of polish.
- Let each layer dry fully.
- Make every leopard spot slightly different.
- Practice on paper before painting your nails.
- Clean mistakes with a small brush dipped in nail polish remover.
Don’t aim for perfection—natural-looking prints are the goal.
How Long Do Brown Leopard Nails Last?
With a quality base coat and top coat, your manicure can last:
- Regular polish: 5–7 days
- Gel polish: 2–3 weeks
Reapplying a top coat every two days helps maintain shine and reduces chipping.
Why Brown Leopard Nails Are So Popular
There are plenty of reasons this trend continues to dominate Pinterest and social media:
- Looks stylish year-round
- Matches casual and formal outfits
- Works on short and long nails
- Complements almond, oval, coffin, and square nail shapes
- Easy to personalize with gold accents or French tips
Whether you’re getting ready for a coffee date, vacation, or special event, this design adds a fashionable touch without being too bold.
Final Thoughts
Now that you know how to create brown leopard nails at home, you can recreate this trendy nail art whenever you want. With just a few nail polish shades and simple tools, you’ll achieve a salon-inspired look that’s elegant, fun, and surprisingly beginner-friendly.
Save this tutorial for your next manicure, experiment with different brown tones, and enjoy creating a nail design that’s both timeless and on trend. Brown leopard nails are proof that a simple pattern can make a big style statement.
Want more nail ideas? Browse our Almond Nails Collection for stylish looks you’ll want to try next.
https://pinkvanityvibes.com/25-stunning-summer-almond-nails/